For blogger.com users, we don't have the flexibility to upload files to the server. So basically, Blogspot users got to use their RSS or ATOM site feed as sitemap. How you do it?
Simple, just make sure you have registered for Google Webmaster Tools.
How to add site in Google Webmaster Tools
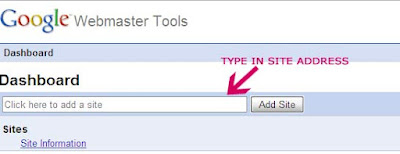
Skip this part if you have added and verified your site. Once you're logged in to Google Webmaster Tools, at the dashboard, type in your website address and click the 'Add Site' button.

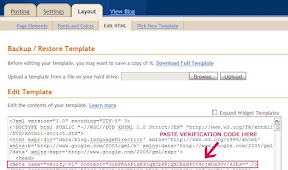
Next, you need to verify the website. For blogger.com users, you can only choose 'Add a meta tag' method to verify. Next you need to copy that code to your Blogspot html layout. Open another tab/browser window, and login to your Blogger.com account.


At, your Blogger dashboard, goto Layout>Edit HTML. Then paste that verification code right after the <HEAD> tag. Proceed to save the template.

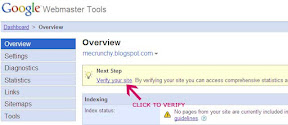
Go back to Google Webmaster Tools, and click on the verify button and you're done.
Adding a sitemap when you're using Blogspot's original feed
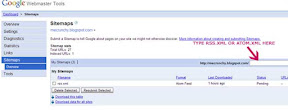
Goto the Sitemap link on Google Webmaster Tools. Type rss.xml or atom.xml in the empty text box right next to your Blog's address. Click 'Submit Sitemap' button and wait for about an hour for the sitemap status to appear.

Adding a sitemap when you're using Feedburner on Blogger
If you're using Feedburner as your site feed, you'll notice that the Sitemap returns an error if you use the original feed. That's because all site feeds is redirected to Feedburner. So, what you need to do is insert another code into the text box if you have Feedburner. Type this code 'feeds/posts/default?redirect=false' in the text box and press the 'Submit Sitemap' button. Wait for about an hour and you should get the sitemap status.

Hi Julissa, that's a nice name. Glad you enjoy visiting my blog.
ReplyDeletewhat's the sitemap for?
ReplyDeleteKenwooi - it means that Google will be updated about your blog, and be told about any new posts so they will be indexed quickly. It's important if you want to more visible on Google.
ReplyDeleteThis post explains the process very well :)
julian thanks for the explanation. Kenwooi for more info, checkout this link http://www.google.com/support/webmasters/bin/answer.py?hl=en&answer=40318
ReplyDeletei like your blog ....
ReplyDeleteThank u r information
ReplyDeleteits very useful